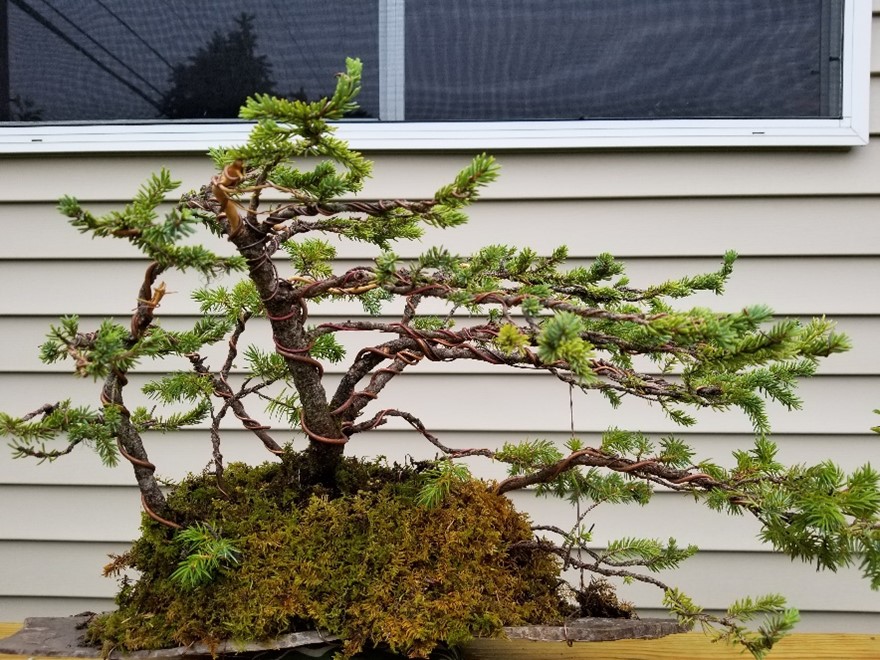
I attended the 2016 American Bonsai Show that was held in St. Louis, Mo. One of the vendors there was Andy Smith, who specializes in collected material from South Dakota. I purchased this tree that Andy collected. It is a Black Hills Spruce and Common Juniper. I thought it was unique as there were two different species that were part of the material collected. Andy planted the material on a slab. Here is a photo of the trees after I purchase the material and did an original styling in a windswept style.
First wiring and styling after pruchase
As you can see the trees have long extension growth and needed to be pushed back. Spruce is a difficult species to keep in place and the branches tend to rise back up after wire removal if not left on the branch long enough to set them in place. I like to wait until the wire begins to bite into the branches at the crotches before removing.
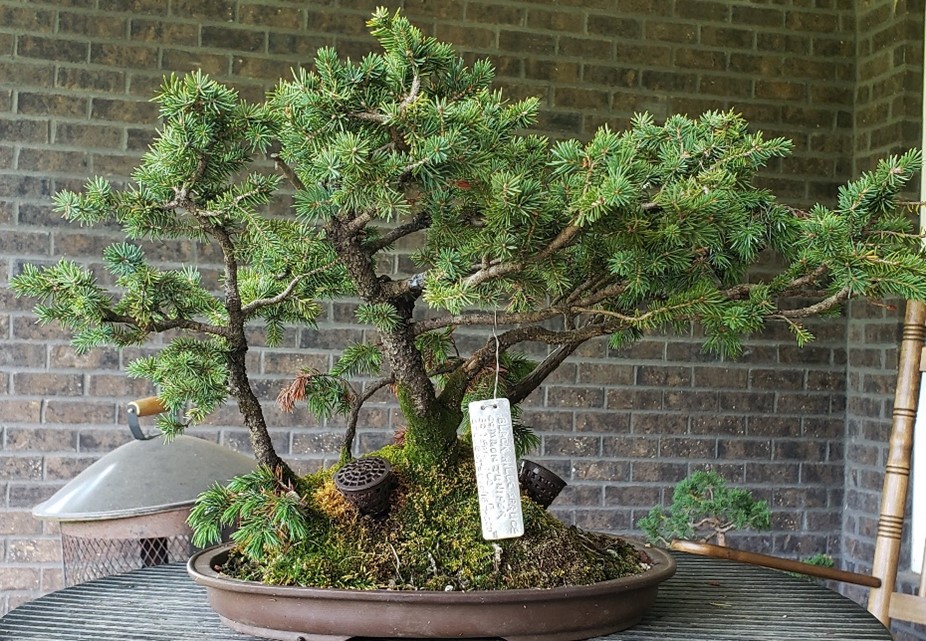
Over the years I reduced the root ball and planted it in a flat oval pot. As you can tell the branches did begin to rise up again from the original wiring. Here is a photo in the oval pot.
Repotted and branches pushed back
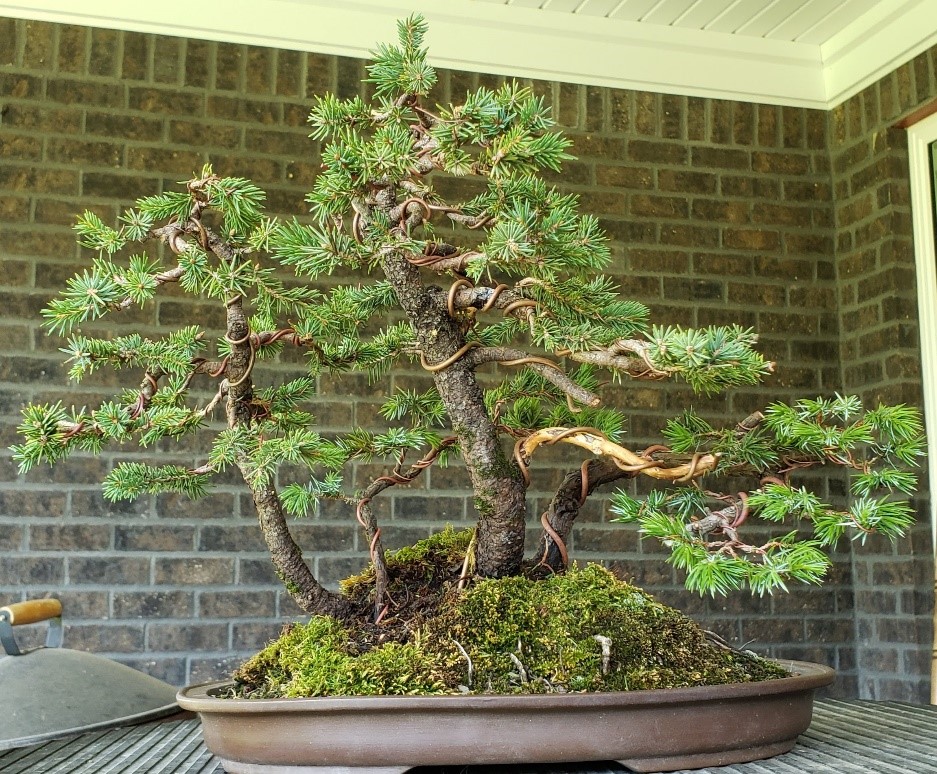
Last year I wired and restyled the tree to move it into a refinement stage. I removed unusable branching down low that did not conform to the styling, or had died back I jined the two lower right-hand branches of the Spruce. Here is the tree after refinement in 2022.
Wired and restyled in 2022 refining
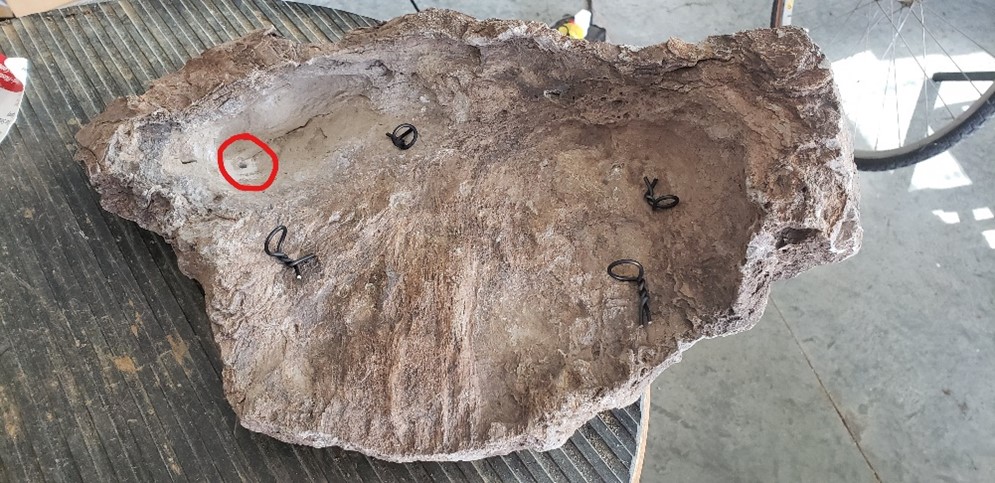
This year I decided it was time to up the look of this tree. I had purchase a rock a couple of years ago with the intention of putting this tree in it. The rock was perfect for the tree and I thought it would make it look as if was collected this way from nature.
The first thing I did was to drill out a drainage hole at the low point in the rock that was thin enough to do this. I used a masonry bit with a hammer drill.
Drainage hole in rock
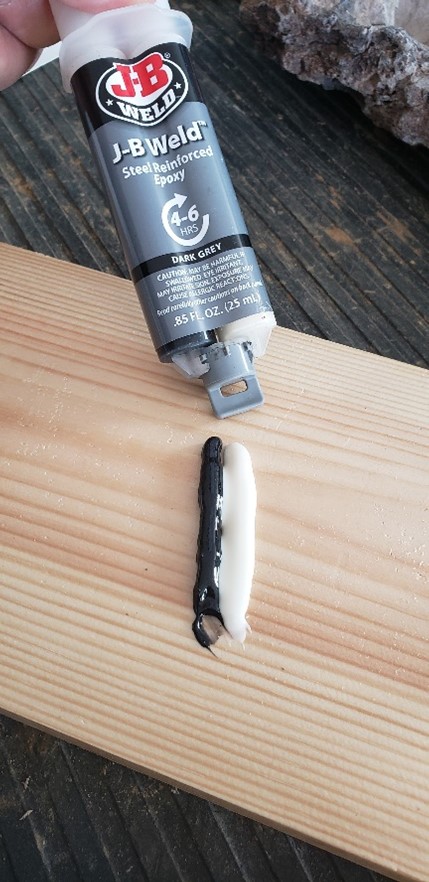
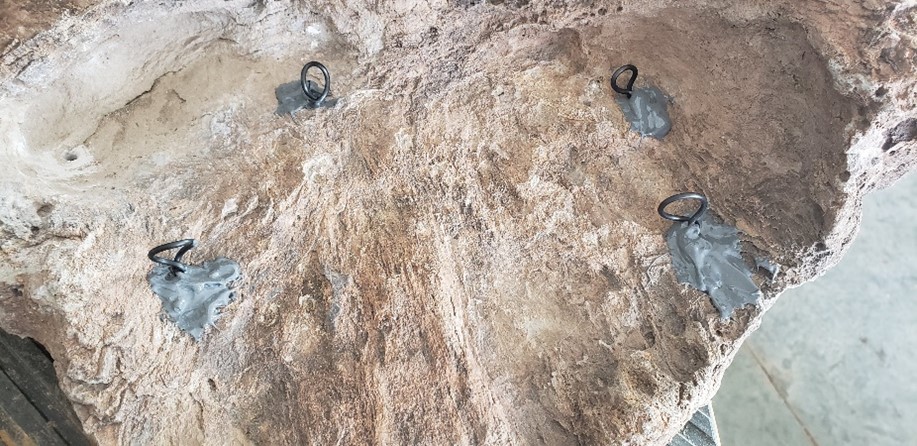
The next thing I did was to attach wire loops to several locations on the rock so that I could secure the tree with wire when it was placed on the rock. I attached the loops using JB Weld, an epoxy that has two chambers in the dispensing tubes that when mixed together can be used to bond materials together.
JB Weld Epoxy
Aluminum loops secured to rock
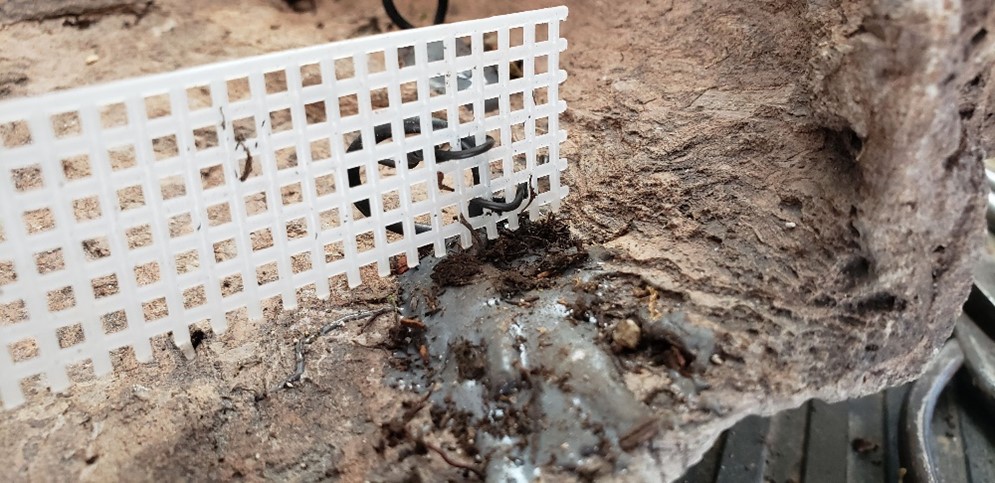
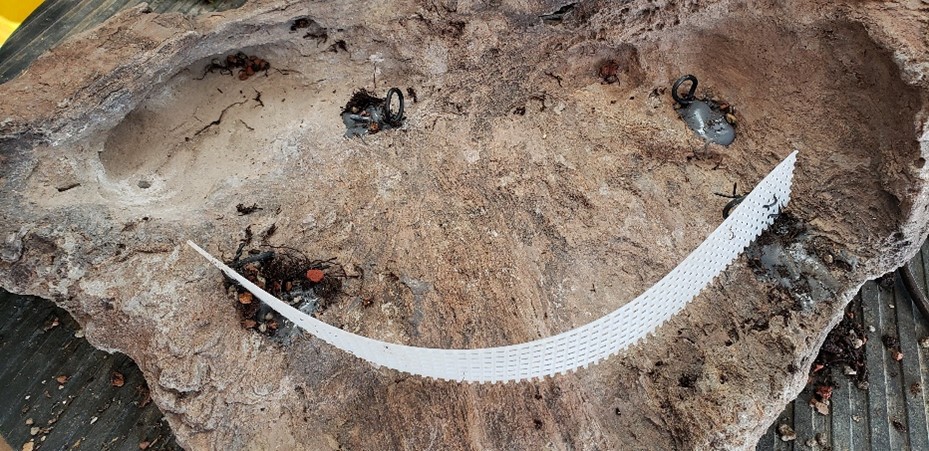
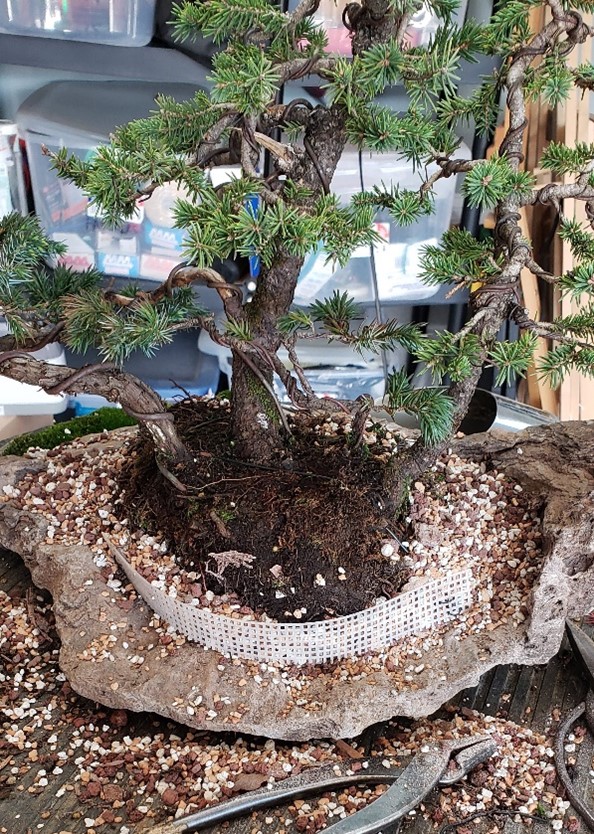
The rock itself had a natural ridge which would contain soil in it on one side. The other side of the rock sloped down and would not contain soil unless a barrier was placed on the rock to contain the soil. I attached a plastic mesh, which can be purchased at any fabric store, by attaching it with wire to two of the loops at the sloping end.
Mesh wired to loop
Mesh barrier installed
I then added my bonsai soil and secured the tree to the rock by wiring it to the loops I secured on the rock with JB Weld.
Bonsai soil added back of tree
Bonsai soil added to back of tree
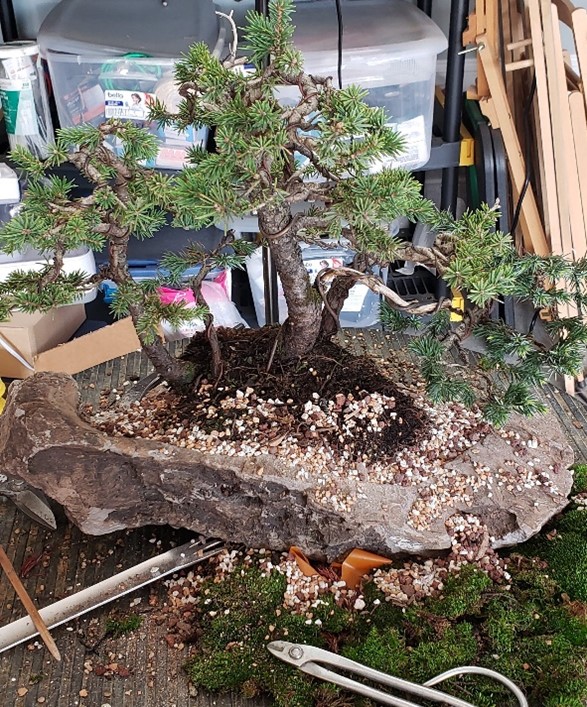
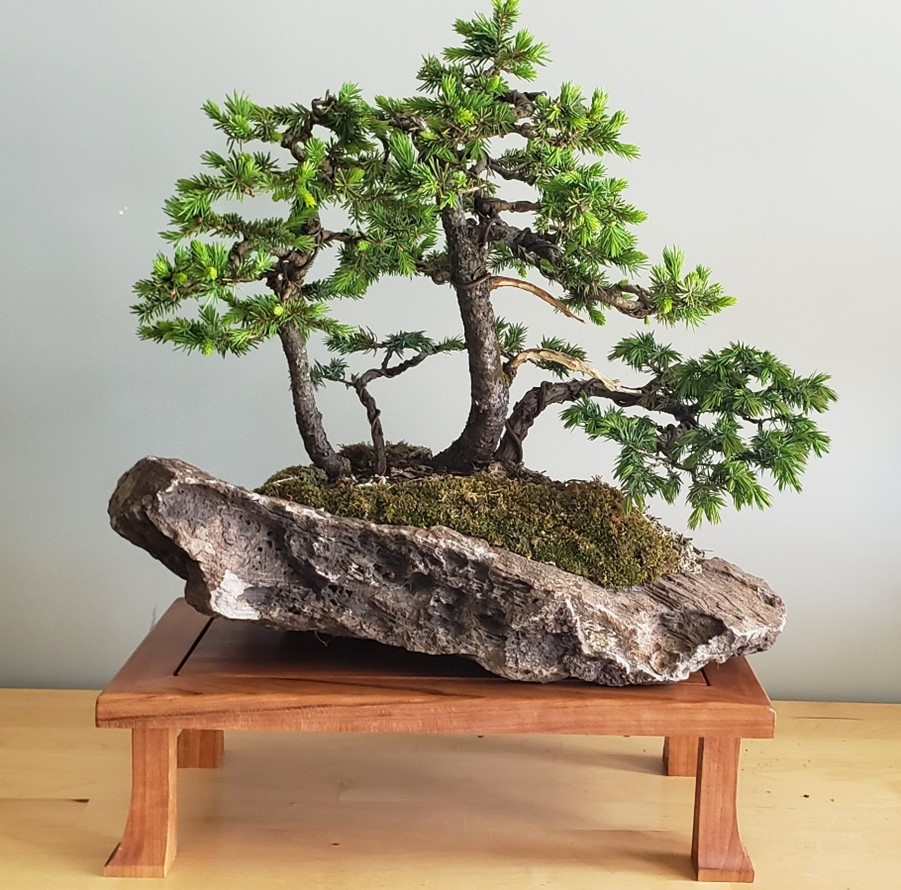
I then put muck over the bonsai soil to further secure the soil and prevent any erosion. After mucking it I placed sphagnum on top and mossed the entire planting. Here is the result. As you can tell it added an element of drama to the presentation. I will have this tree in the upcoming Spring Bonsai Weekend at the Waterfront Botanic Garden.